还在为各种朋友圈集赞活动,点赞数量不够而发愁吗?快来用“集赞”,1比1微信模拟器,轻松设置点赞数,可现场查验,可录屏,轻松薅羊毛。操作简单,纯净无广告,体验效果绝非是那种仅仅生成一张图片能比的。
复制这个链接https://itakeo.com/wx
安卓设备使用Opera浏览器打开
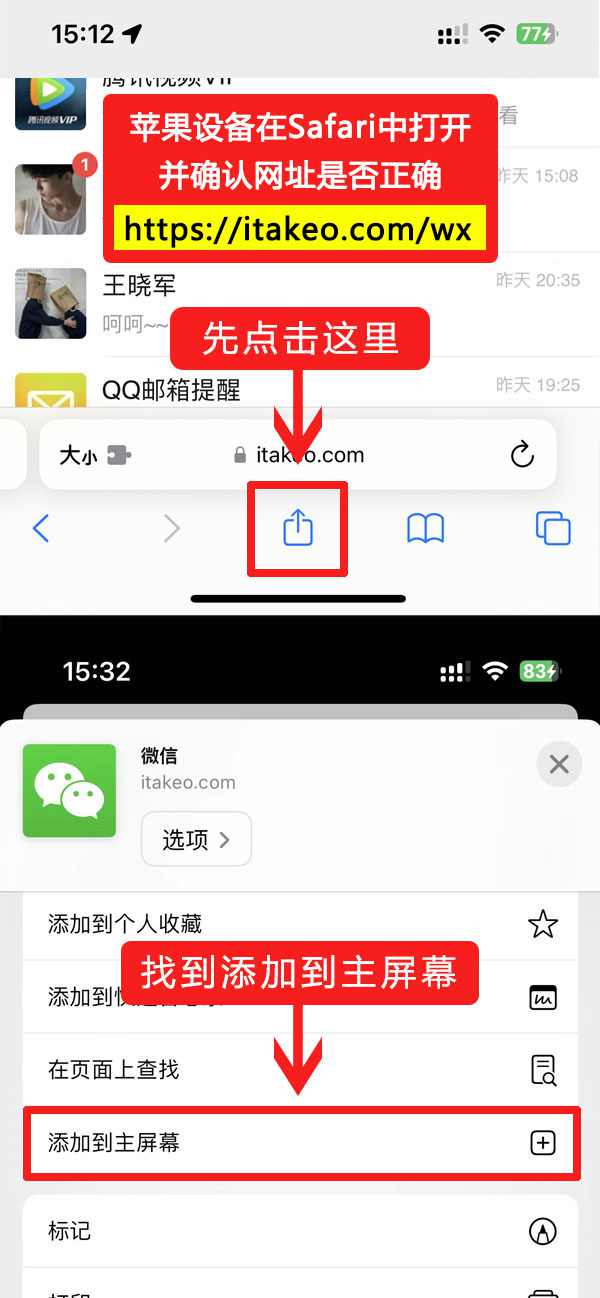
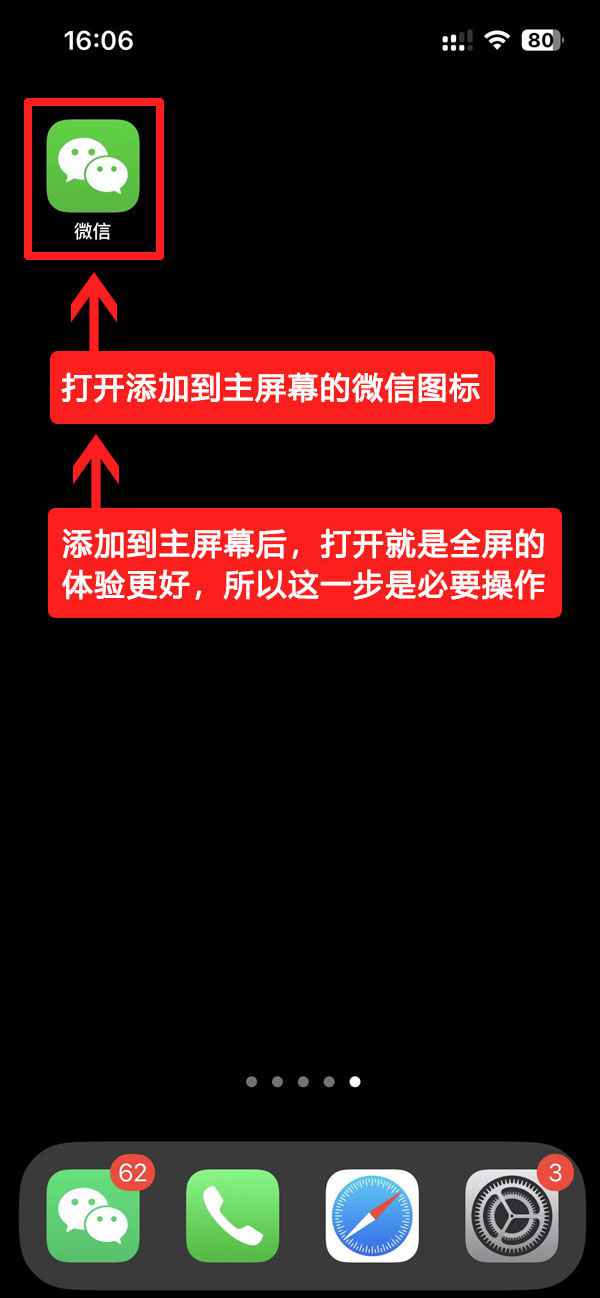
苹果设备使用Safari浏览器打开
注意:安卓需要Opera浏览器,为什么用Opera?因为安卓浏览器千奇百怪,做不到统一,如果你坚持用其他浏览器,可能会遇到奇奇怪怪的问题 (比如无法全屏、无法添加到桌面、无法多选图片、卡顿等等)。
如果需要电脑端使用,推荐使用网易的MuMu模拟器https://mumu.163.com,然后安装X86版本Opera浏览器 请点这里下载电脑端版本 ,剩下步骤同安卓一样,添加到主屏幕。
视频教程
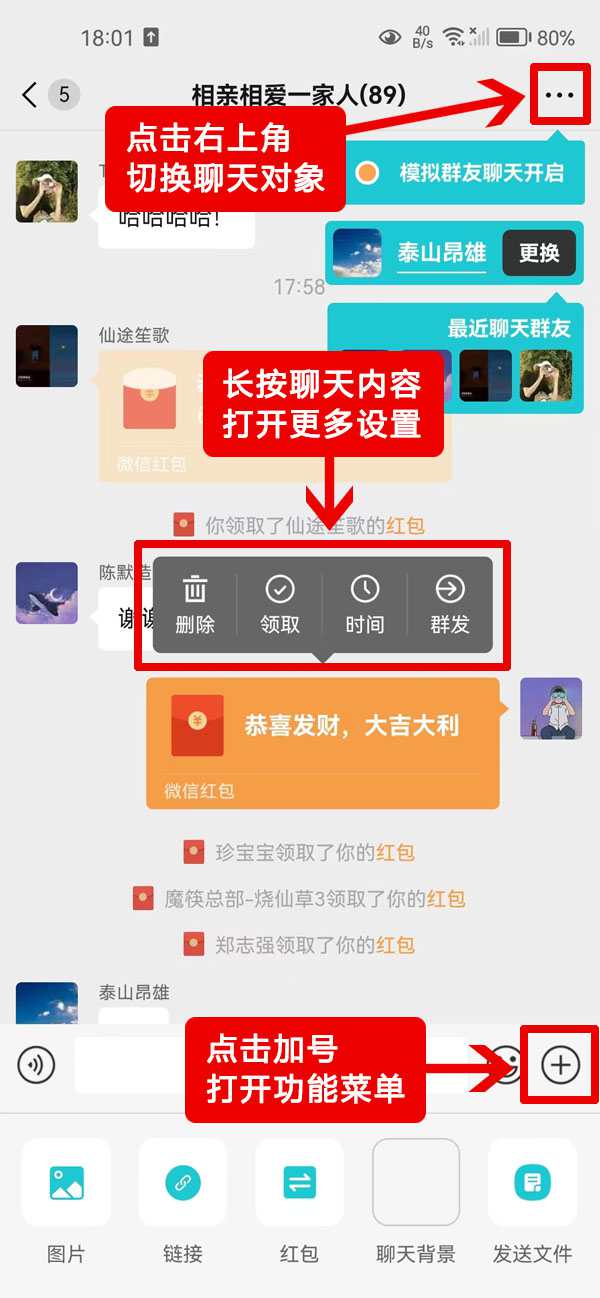
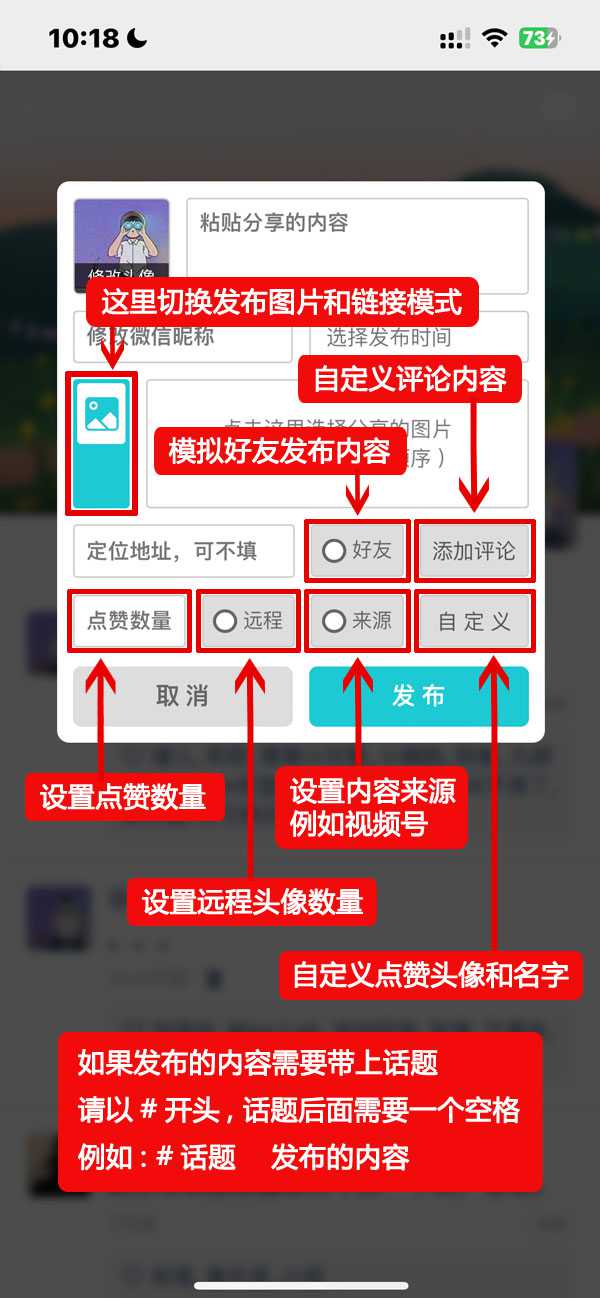
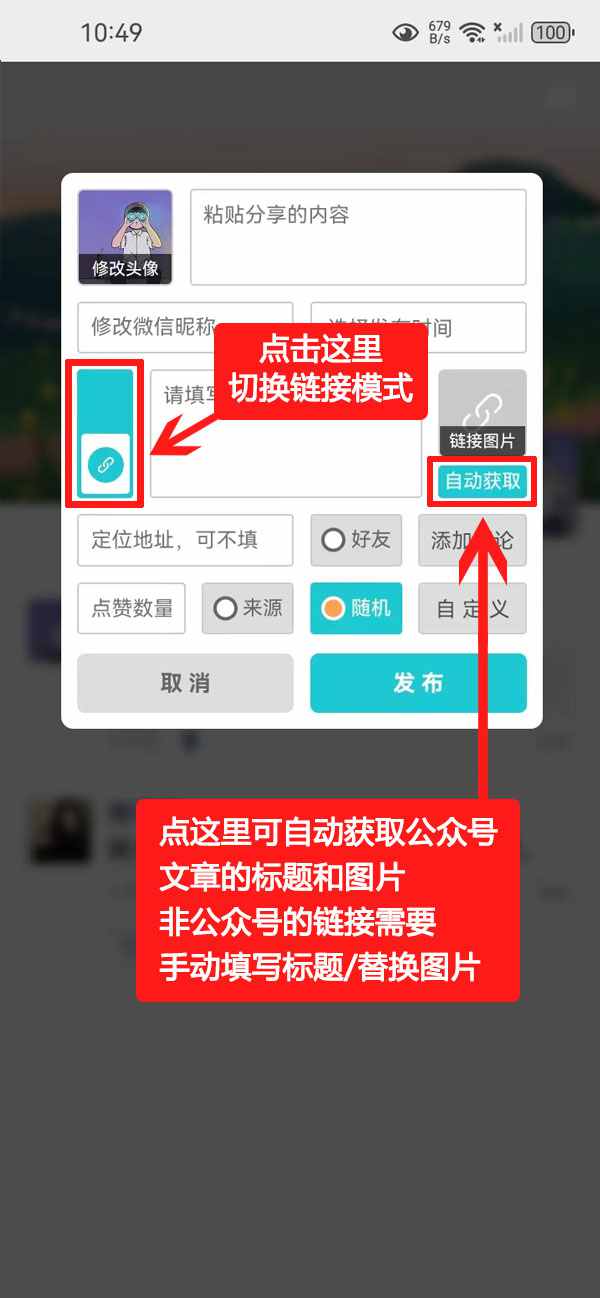
图文教程


关于安全声明:这仅仅是一个网页,不用注册,不用下载,直接在线使用,所有处理都在本地完成,不上传任何信息,绝对安全放心。
友情提醒1、该工具只是一个模拟器,并非真实的。2、部分功能需要激活码,有效期为一个月。3、如有bug或其他建议可以在下面的评论区留言或者添加此页面下面的微信进行反馈。
问题反馈

你似乎将使用说明添加到主屏幕了,而不是集赞,集赞的网址是这个:
https://itakeo.com/wx
请删掉使用说明图标,重新添加!

点击右上角,选择在浏览器中打开下载

能否增加个朋友圈点赞评论正在进行的视频效果那种效果
这个有的
转发公众号文章现在有大图模式的,不是长条那种的,什么时候更新?
该问题已修复。
小程序链接功能什么时候加
我觉得非常好用,我也想上啊,下一个
朋友圈现在会显示年份,可以添加下哦
时间久了就会显示年月日
VIVO手机为什么不能添加到主屏幕
添加主屏幕的权限没有打开
为什么红米不能用到桌面?
权限没有打开,教程有说明
能不能添加自动回复啊
可以的
手机型号能自定义吗
为什么添加到主屏幕点不进去啊
添加主屏幕的权限没有打开
灰常好用呀!
希望可以成功,一直想要这个软件
不是苹果咋办
苹果安卓都可以
除了苹果和安卓其他的可以吗?
安卓 语音转文字 右侧用户对话框文字不能左对齐
该问题已修复